
Introduction
Uninstalling a game on the PlayStation 4 is a straightforward process, but sometimes, it can be a bit confusing if you’ve never done it before. In this comprehensive guide, we’ll walk you through the steps to Uninstalling GTA V on PS4. Whether you’re freeing up storage space or moving on to a different game, we’ve got you covered. So, let’s dive into the step-by-step instructions for removing GTA V from your PS4.
Step To Uninstalling GTA V on PS4
Step 1: Navigate to the Home Screen
The first step is to navigate to your PS4’s home screen. To do this, press the “PS” button on your controller or select the “Home” option on the top menu bar. You should now be on the main screen where all your games and apps are displayed.
Step 2: Locate the Game Icon
Next, locate the GTA V game icon on your home screen. It should be represented by an image of the game’s cover art. Use the left analog stick on your controller to move around the screen and find the GTA V icon. Highlight it by moving the cursor over it.
Step 3: Press the Options Button
With the GTA V icon highlighted, press the “Options” button on your controller. This button is usually located to the right of the touchpad and is represented by three horizontal lines. Pressing it will bring up a menu with various options.
Step 4: Select “Delete”
In the options menu that appears, you will see a variety of actions you can take with the game. Look for the “Delete” option and select it by pressing the “X” button on your controller. This action will initiate the uninstallation process for GTA V.
Step 5: Confirm Deletion
After selecting “Delete,” the PS4 will ask you to confirm your decision. It will display a message that says, “Do you want to delete [Grand Theft Auto V]?” Use the directional pad on your controller to highlight “OK,” and then press the “X” button to confirm the deletion.
Step 6: Wait for Uninstallation
Once you’ve confirmed the deletion, the PS4 will start the uninstallation process. This may take some time, depending on the size of the game and the amount of data that needs to be removed. You’ll see a progress bar indicating the status of the uninstallation.
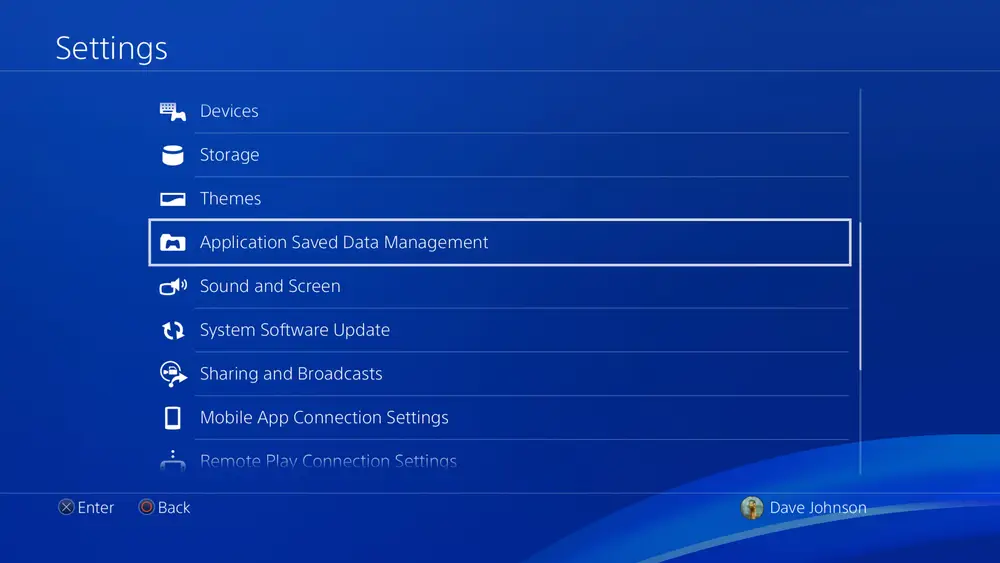
Step 7: Delete Saved Data
While the game itself is being uninstalled, you might want to consider deleting any saved data associated with GTA V. This step is optional, but if you’re certain you won’t be playing the game again, it can help free up additional storage space. To delete saved data, go back to the home screen, navigate to the “Settings” menu, select “Application Saved Data Management,” and choose “Saved Data in System Storage.” From there, you can delete any GTA V saved data you no longer need.
Step 8: Confirm Deletion of Saved Data
Similar to the game deletion process, you’ll be asked to confirm the deletion of saved data. Follow the on-screen prompts and confirm your decision. Remember that this will permanently remove any progress or saved games associated with GTA V.
Step 9: Monitor Storage Space
After the uninstallation is complete, you can check your available storage space by going to the “Settings” menu, selecting “Storage,” and then choosing “System Storage.” This will give you an overview of your available space, which should now reflect the freed-up storage from removing GTA V.
Step 10: Reinstall or Free Up Space
With GTA V successfully uninstalled, you now have more space on your PS4. You can use this space to install new games, applications, or simply free up room for future downloads and updates. If you ever want to reinstall GTA V, you can do so from your library of purchased games in the PlayStation Store without having to repurchase it.
Conclusion On
Uninstalling Grand Theft Auto V from your PS4 is a straightforward process that can help you manage your storage space more efficiently. Whether you’re making room for new games or just cleaning up your system, following these steps will ensure you can uninstall GTA V with ease. Remember to also delete saved data if you’re certain you won’t be returning to the game. Enjoy your newfound storage space and gaming adventures!